
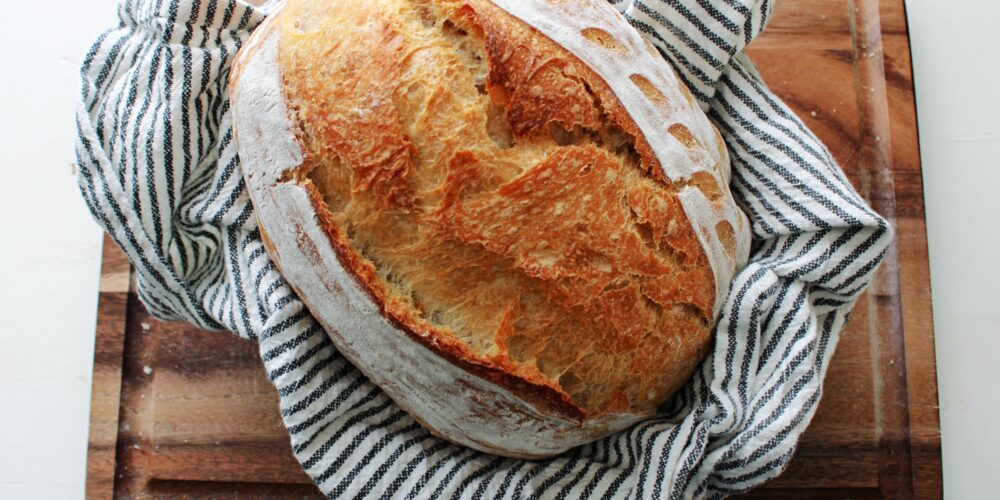
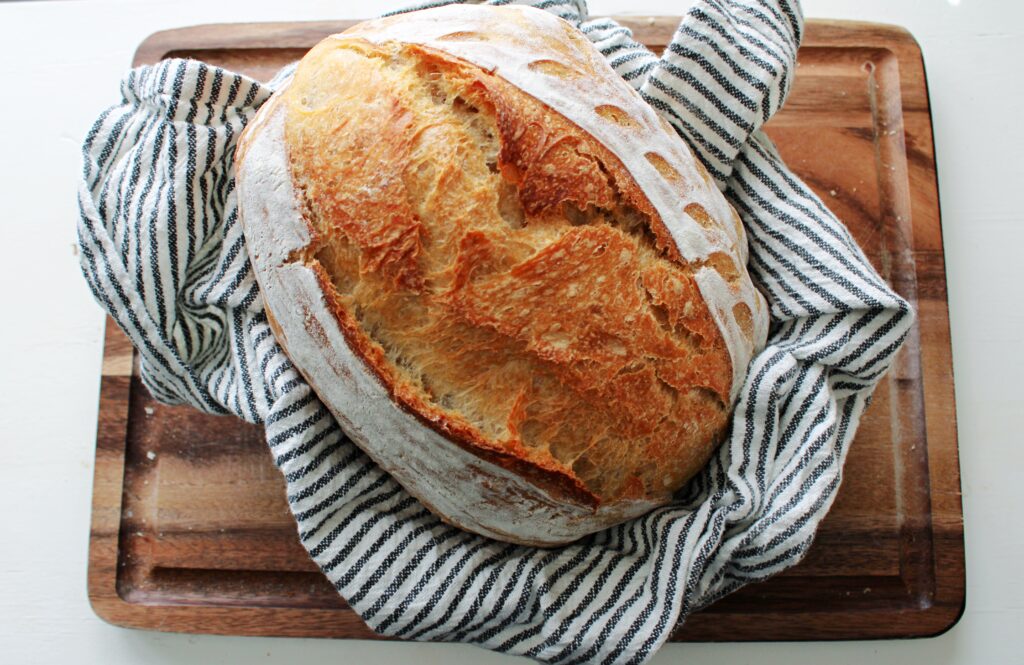
Today we’ll walk you through exactly how to make same day sourdough bread by dinnertime, why it works, and how to get amazing results even if you’re a total beginner.
We’ve all been there — scrolling through gorgeous photos of crusty sourdough loaves, only to realize… the recipe takes three days.
Life is busy, and sometimes you want actual, healthy bread to feed your family today — not next week.
That’s where same day sourdough comes in. This faster method is perfect if you’re short on time but still want a loaf that feels (and tastes) like it took days to make.
Why Make Same Day Sourdough?
Most sourdough recipes call for a slow, overnight proof. Here, we work with a slightly warmer dough and a more active starter to speed up fermentation — while still creating a loaf that’s beautifully open, chewy, and flavorful.
It’s still naturally leavened, still delicious, just…faster. No shortcuts that compromise flavor. Just smart tweaks for real life.
Tips for Making Same Day Sourdough Bread
- You can absolutely use cups to measure your ingredients, but a kitchen scale really helps with sourdough. Your results will be much more consistent.
- I recommend mixing your starter and water together first and then adding in the flour and salt. By mixing your starter and water together first, now all you have to do is make sure the water and flour are mixed together well. If your water is well incorporated, so is your starter:).
- I know it’s tedious, but don’t skip the stretch and folds. This will help build up the gluten your bread needs.
- Proof time is flexible. Depending on the temperature of your house and your starter, that might speed up or slow down your fermentation process. Trust your dough not the clock!
Common Questions About Same Day Sourdough Bread
Technically yes, but a short rest helps the loaf stay tall and springy.
If your kitchen is cold, fermentation will be slower. Try proofing in a warmer spot (75°F–80°F is ideal). Something I do to help with this is by placing my dough in my oven, and turning my oven light on (do not turn your oven on!). This helps create the warmth and humidity your dough is looking for.
Before trying the oven trick, I recommend taking your dough’s temperature 30 minutes after your last stretch and fold. If your dough is on the warmer side, you might not need to do the oven light trick. I HIGHLY recommend using the bulk fermentation chart by The Sourdough Journey. This changed the game for me, and I realized my dough was on the colder side.
Tips – This is also a great way to get your starter to double in size if you don’t have a very active starter.
Whole wheat flour has more nutrients and ferments faster, giving your starter extra strength for a quick rise.
Tools you May Need
To Feed Your Starter:
Measuring cups
Silicon spatula
Creating the Dough:
Danish dough whisk – This whisk is much easier to mix the dough if you are mixing by hand.
Stand Mixer – If you’re not mixing by hand.
Large bowls
Kitchen scale
Measuring cups

Ingredients You’ll Need to Make Same Day Sourdough Bread By Dinnertime
To Feed Your Starter:
1/2 cup – Bread flour
1/2 cup – Whole wheat flour
1 – 1/2 cups – Water
For The Dough:
450g – Bread flour
100g – Active sourdough starter
10g – Salt
307g – Water
How to Make Same Day Sourdough Bread By Dinnertime:
1. Feed Your Starter (Before bed the night before)
Feed your starter 4 – 6 hours before making your same day sourdough bread by dinnertime. You want your starter to be bubbly and active before mixing. If you want to be super accurate while doing this, use a 1:1:1 ratio (equal parts starter, water, and flour by weight). We follow the measurements below and still get a bubbly starter in the same amount of time. I also feed my starter right before bed the night before and it’s always ready to go in the morning. This could work great for those of you that have a colder home.
1/2 cup – bread flour
1/2 cup – whole wheat flour
1 cup – water
2. Mix the Dough (First thing in the Morning)
In a large bowl or stand mixer:
- Stir together 100g of fed starter and 307g water until it creates a frothy consistency.
- Next add 450g bread flour and 10g of salt.
- Mix until you see the dough come together.
- Let the dough sit for 1 hour to allow the flour to hydrate and gluten to develop.
3. Strengthen with Stretch & Folds
To build strength without kneading:
- Do 3 rounds of 4-5 stretch and folds (lift, stretch, fold) spaced 30 minutes apart.
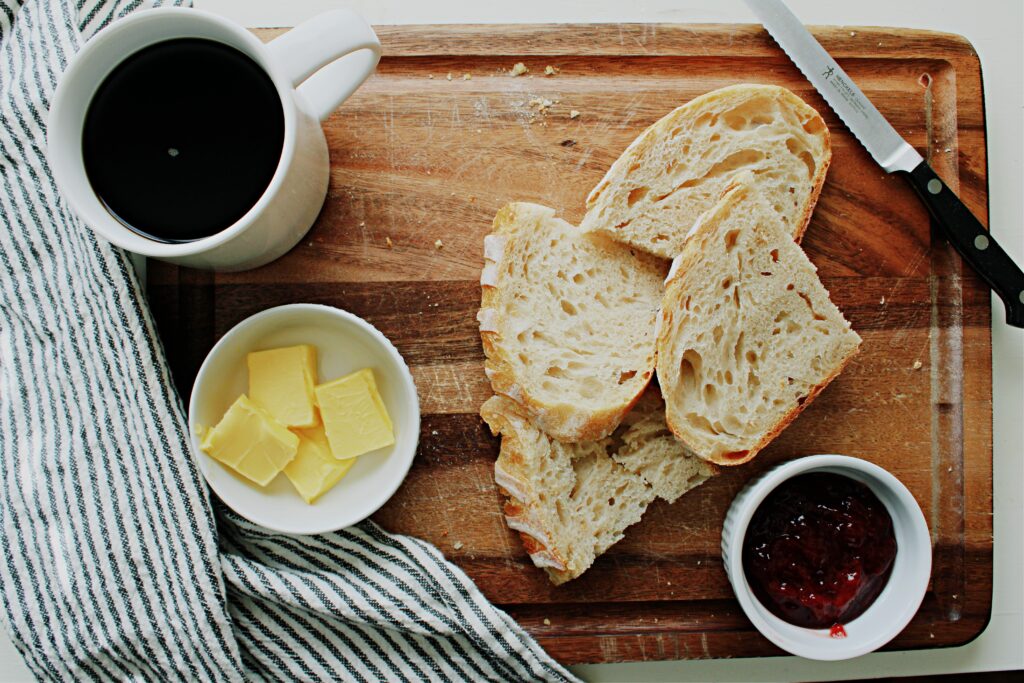
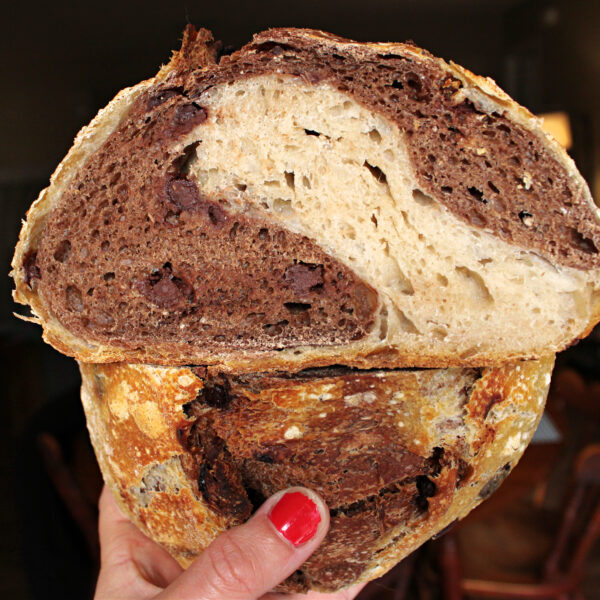
This method creates beautiful structure and open crumb! This process should take about an hour and a half.
4. Bulk Fermentation (During the Work Day)
Cover your dough and let it rise at room temperature until its doubled in size. As mentioned earlier, please take your dough’s temperature and refer to the bulk fermentation chart by The Sourdough Journey. This will show you how long your dough should bulk ferment for.
If your dough is chilly, place the bowl in a turned-off oven with the light on. This creates warmth and humidity that your dough will love and might encourage the fermentation process to speed up.
✨ Finger poke test: Gently press your finger into the dough. If it springs back slowly but leaves a slight indent, it’s ready!
5. Shape the Dough
On a lightly floured surface:
- Gently stretch your dough into a rectangle.
- “Stitch” by folding sides toward the center like closing a letter.
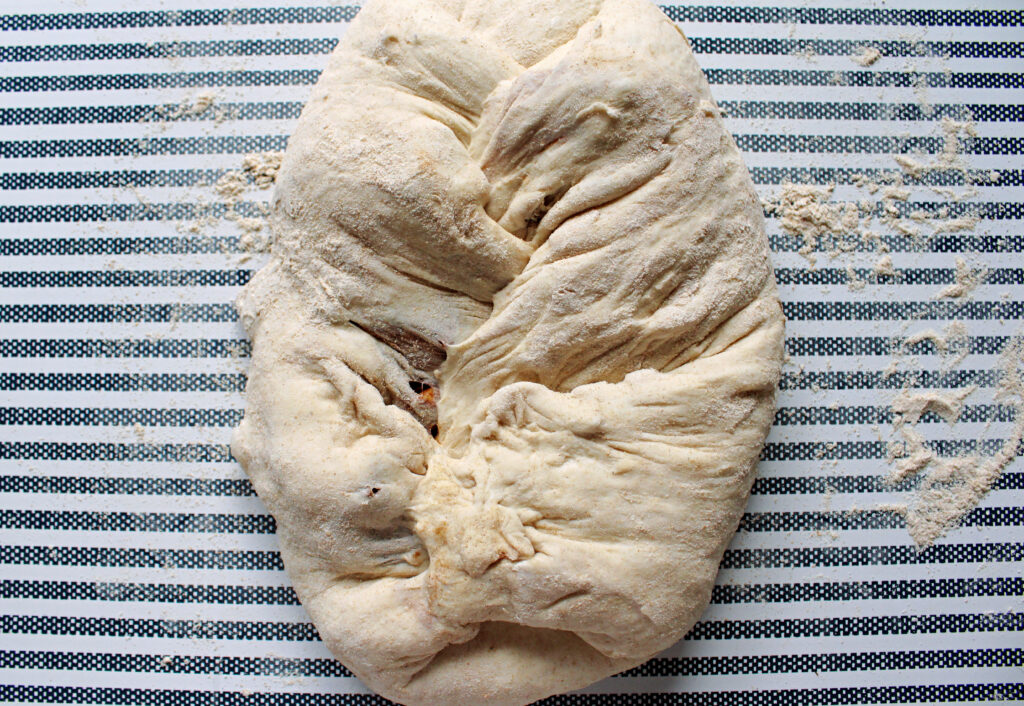
- Roll it up tightly from bottom to top, building tension.
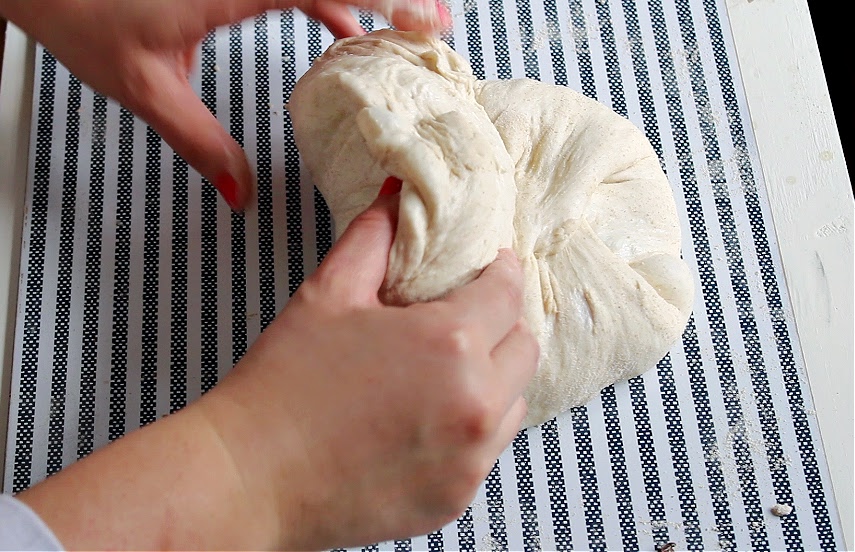
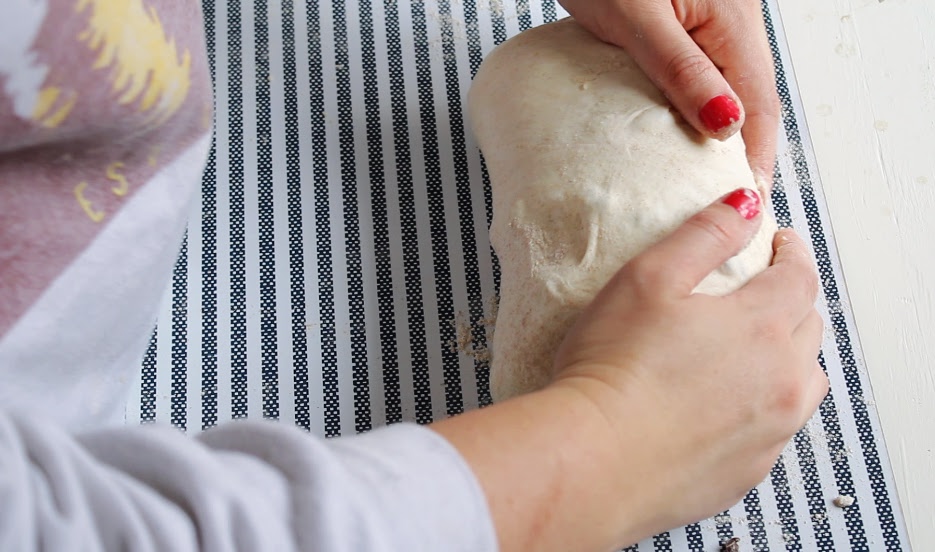
Place the dough seam-side facing up in a floured proofing basket or bowl.
6. Final Proof (Optional but Helpful)
If you can, let your dough rest for 30–60 minutes before baking.
This relaxes the gluten and helps your loaf hold its shape.
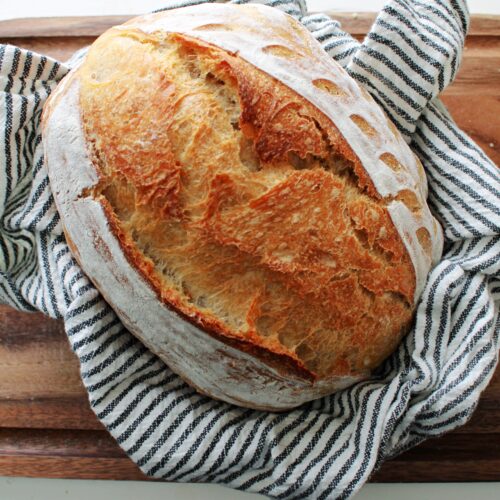
7. Score and Bake (Evening)
- Preheat your oven (and Dutch oven) to 420°F (216°C).
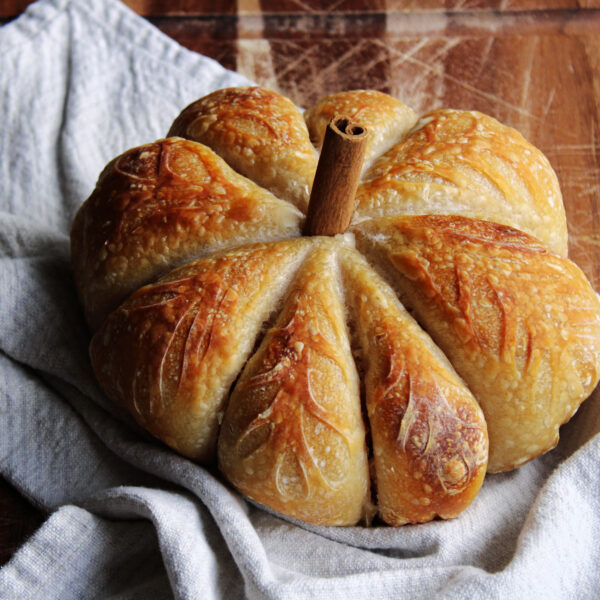
- Score your dough with a sharp blade — get creative!
- Bake for 25 minutes with the lid on and 25 minutes with the lid off.
Cool completely before slicing (if you can wait!)
Storage
Once your loaf is completely cooled, slice and store in the freezer. You can store in the freezer for 1 – 3 months and about a week in the fridge.
How to Make Same Day Sourdough Bread by Dinnertime
Equipment
- Measuring cups
- Silicon spatula
- Danish dough whisk This whisk is much easier to mix the dough if you are mixing by hand.
- Stand Mixer If you're not mixing by hand.
- Large bowls
- Kitchen scale
Ingredients
To Feed Your Starter
- 1/2 cup Bread flour
- 1/2 cup Whole wheat flour
- 1 – 1/2 cups Water
For The Dough
- 450 g Bread flour
- 10 g Salt
- 100 g Active Sourdough Starter
- 307 g Water
Instructions
Feed Your Starter (Before bed the night before)
- Feed your starter 4 – 6 hours before making your same day sourdough bread by dinnertime. You want your starter to be bubbly and active before mixing. If you want to be super accurate while doing this, use a 1:1:1 ratio (equal parts starter, water, and flour by weight). We follow the measurements below and still get a bubbly starter in the same amount of time. I also feed my starter right before bed the night before and it’s always ready to go in the morning. This could work great for those of you that have a colder home.1/2 cup – bread flour1/2 cup – whole wheat flour1 cup – water
Mix the Dough (First thing in the Morning)
- In a large bowl or stand mixer, Stir together 100g of fed starter and 307g water until it creates a frothy consistency.
- Next add 450g bread flour and 10g of salt.
- Mix until you see the dough come together.
- Let the dough sit for 1 hour to allow the flour to hydrate and gluten to develop.
Strengthen with Stretch & Folds
- Do 3 rounds of 4-5 stretch and folds (lift, stretch, fold) spaced 30 minutes apart.
- This method creates beautiful structure and open crumb! This process should take about an hour and a half.
Bulk Fermentation (During the Work Day)
- Cover your dough and let it rise at room temperature until its doubled in size. As mentioned earlier, please take your dough’s temperature and refer to the bulk fermentation chart by The Sourdough Journey. This will show you how long your dough should bulk ferment for.
- If your dough is chilly, place the bowl in a turned-off oven with the light on. This creates warmth and humidity that your dough will love and might encourage the fermentation process to speed up.
Shape the Dough
- On a lightly floured surface, gently stretch your dough into a rectangle.
- “Stitch” by folding sides toward the center like closing a letter.
- Roll it up tightly from bottom to top, building tension.
Final Proof (Optional but Helpful)
- If you can, let your dough rest for 30–60 minutes before baking. This relaxes the gluten and helps your loaf hold its shape.
Score and Bake (Evening)
- Preheat your oven (and Dutch oven) to 420°F (216°C).
- Score your dough with a sharp blade — get creative!
- Bake for 25 minutes with the lid on. 25 minutes with the lid off.
- Cool completely before slicing.
Notes
If you liked this recipe it would mean the world to us if you gave it 5 stars! Don’t forget to tag us on Instagram @goldenhourgrains to show us your wonderful creations!
Watch the Video:
Are you local?
If you live in the Lubbock, TX area we would love to bake bread for you! Sign up for reminders for our next bread drop so you don’t miss a chance to pre-order bread from us!
Pin For Later:

Want More Recipes?
Check out our latest sourdough discard recipe below!

Hi!! I just made my second loaf of sourdough bread using your recipe! This was my first attempt at sourdough baking and I’m so happy I came across your bread recipe. It was so easy to follow and although I was nervous for the outcome it was beautiful and delicious!! My daughter who has been baking sourdough for a couple of years said it was the best sourdough she has ever had! Thank you for 😊
That’s amazing! I’m so glad you tried it.
I found your recipe on Pinterest and since I’m a newbie to making sourdough, I had to try it.
My sourdough turned out great! Wish I could post pictures here but it really did turn out wonderfully. Nice and soft inside and the crust is really crispy.
My husband and I have been buying sourdough loaves from every bakery we’ve come across over our 30 years and this was really cool to make my own.
I will say, it’s a LOT more involved than regular bread (which I’ve been making for decades), but only in the amount of time it takes. Whew. I have a new-found respect for those who do this regularly.
I used a starter from a small company online who has several different kinds and ages. Called living dough dot com. Delete if not allowed. I got the 150 year old Egyptian Whole Wheat starter. It comes fresh, not dehydrated and smells divine. I think once I get used to making sourdough, I’ll get their 400 year old Bavarian “Black Death” starter.
Given how easy this recipe is, I can see me doing this on occasion.
Question: what is the best way to transfer the dough from my bowl to the dutch oven for baking? Made me real nervous cause I had to roll it into my hand holding a thick cloth (so as not to put any finger indentations in it) and then roll the dough into my dutch oven
c a r e f u l l y.
Thank you for this recipe!
Hi! I’m so glad this recipe worked for you. After bulk fermentation, I always transfer my dough onto floured parchment paper and place that into the dutch oven. Hope this helps!
My loaf came out undercooked.
I wouldn’t suggest it!
Hi Sam! Sorry to hear about your loaf! I would try adjusting your oven temperature next time as that can be a common factor in timing for bread baking. I appreciate you trying the recipe regardless. Have a great day!
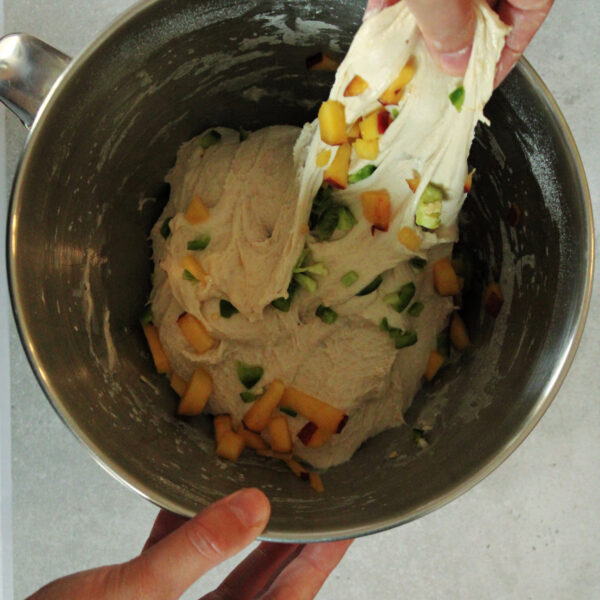
Love this recipe! Can you add inclusions to this?
Hi Apryl,
Yes you can add inclusions to this recipe. I would recommend adding them during the last stretch and fold before bulk fermentation so the inclusions are spread evenly throughout. If you do this please keep in mind the bulk rise might take a bit longer. You can also add them during the final shaping if that’s easier. Glad you liked the recipe!
my first loaf is in, seems a little flat going in? will update when its done
I LOVED your recipe. I did modify to add whole wheat flour 50 g instead of all the regular flour and just use regular starter. I also added everything bagel on last fold and oh my gosh it was a great recipe. easy to follow and it was one of our favorite ones! I just started a few weeks ago into my sour dough era and gosh this was a marvelous recipe find! thank you so much for posting it!
Hi Karen,
I’m so glad you enjoyed it! Thank you for trying the recipe!