
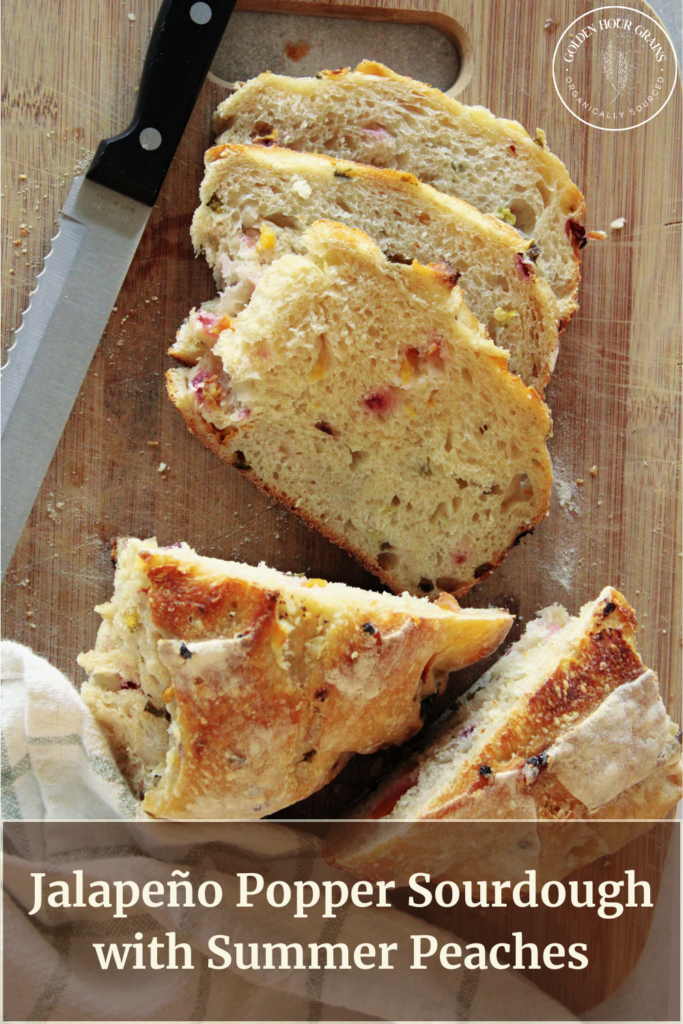
Today, we’re walking you through one of the best sourdough inclusions I’ve tried in a long time, Jalapeño popper sourdough with summer peaches. This is the perfect cheesy, spicy snack with a little sweetness.
Once you’ve found a sourdough recipe you can rely on, it can get a bit repetitive. There are so many ways to switch things up with sourdough inclusions and this is just the beginning.
Why You’ll Love This Recipe
Sweet and Spicy – There is nothing better than a sweet and spicy combo! The spiciness from the jalapeño compliments the sweetness from the peaches and creaminess of the cream cheese. Truly a match made in heaven.
Beginner Friendly – A lot of people are intimidated to try sourdough because there are a lot of steps. But a lot of steps does not mean labor intensive, This recipe is perfect for beginners because most of what you do is wait for the dough to do it’s magic while you continue living your life.
Top Tips
- Use a whisk to mix the sourdough starter and water together. This will make sure the starter is evenly distributed throughout the dough.
- Make sure you’re using warm water in your dough mixture, especially if your sourdough starter is still a bit cold. This will help the dough rise a bit quicker.
- When you are adding inclusions, expect longer rise times during bulk fermentation. The extra moisture from the inclusions slows fermentation down.
Common Questions about Sourdough
Technically yes. It’s not a deal-breaker but letting the dough rest for a bit before baking helps the loaf stay tall and springy while baking.
Absolutely! I do this when I’m short on time. Sometimes it’s just easier to add them during shaping and pop it in the oven. However, your inclusions might not be evenly distributed throughout your bread if you do this.
Adding inclusions can make the bulk fermentation step a little tricky. The extra moisture from the inclusions add extra hydration which slows down the bulk fermentation process. If your house also runs cold this can slow things down even more. Instead of eyeballing it, I recommend taking your doughs temperature to see if it’s ready. u003ca href=u0022https://www.instagram.com/the_sourdough_journey/u0022u003eThe Sourdough Journeyu003c/au003e has a chart in his bio that is an EXCELLENT guide to what you should be looking for. You might have to let your loaf sit out for longer than you’re used to but trust the process!
Whole wheat flour has more nutrients and ferments faster. This gives your starter extra strength for a quick rise.
Tools You May Need
To Feed Your Starter
For the Dough
Stand Mixer with dough hook attachment – Not essential but it is easier.
Food scale – This will create a consistent loaf every time!
Measuring cups
Plastic bag/tea towel
Sourdough score
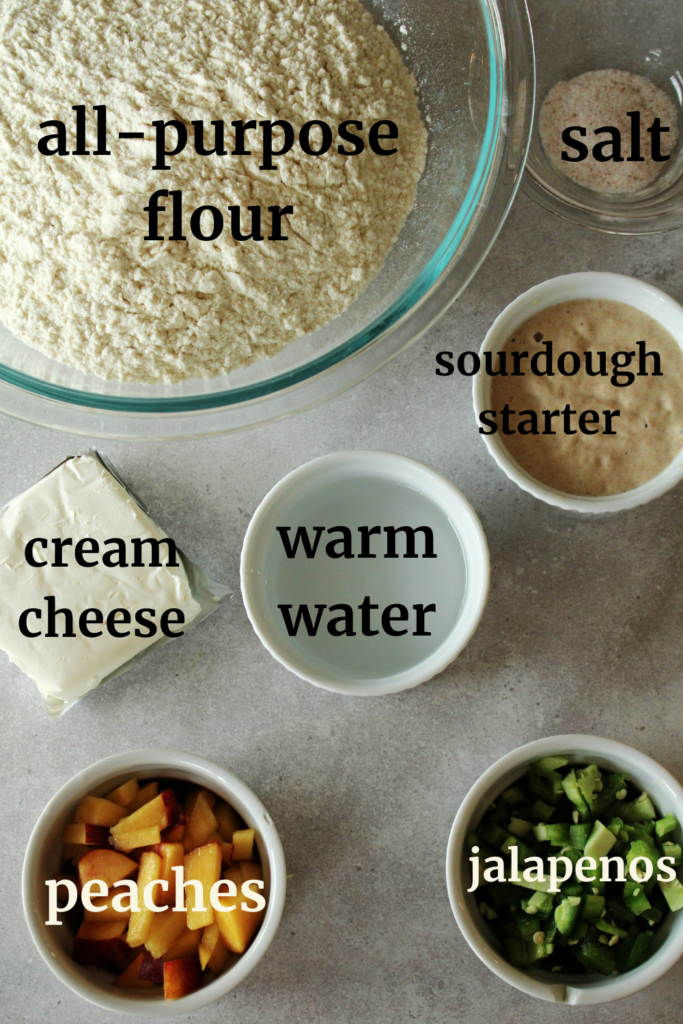
Jalapeño Popper Sourdough with Summer Peaches Ingredients
Here’s everything you’ll need to feed your starter and create the dough for this jalapeño popper sourdough with summer peaches;
For Feeding Your Starter
1/2 cup – Bread flour or all-purpose flour
1/2 cup – whole wheat flour
1 – 1.5 cups – warm water
For the Dough
475g – All-purpose flour
112g – Active sourdough starter
307g – Warm water
10g – Salt
1 cup – chopped jalapeños
1 cup – chopped peaches
1/2 block – cream cheese
How to Make Jalapeño Popper Sourdough Bread with Summer Peaches
1. Feed Your Starter the Night Before
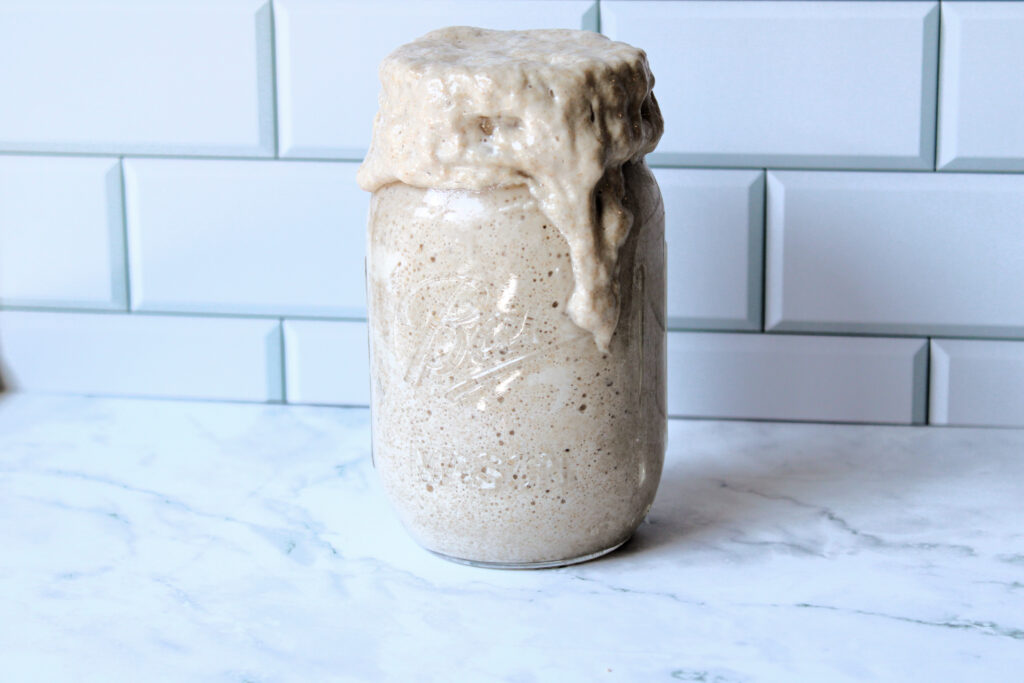
Ideally, you’ll want to feed your starter 4 – 6 hours before making your loaf. This timeframe is ideal for the summertime, but if your house is on the cooler side or you’re making this during the colder months, your starter might take longer to rise. To make sure your starter is ready to use first thing in the morning, I would recommend feeding it the night before.
2. Mix the Dough
First, mix your active starter (112g) and warm water (307g) together using a whisk. This will make sure the starter is evenly distributed which is important during bulk fermentation.
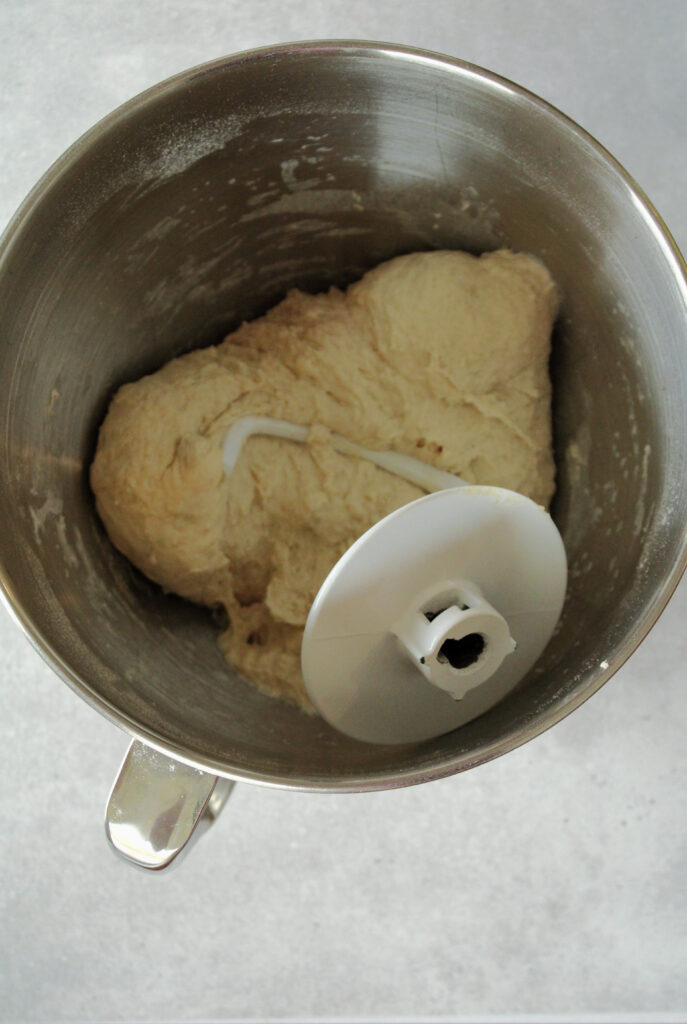
Next, add your flour (475g) and salt (10g) to the mixer. Make sure these ingredients are also well-combined. Once all of your ingredients are in the bowl, use the dough hook attachment to combine everything. Keep your mixer on the lowest setting. Once your dough comes together and isn’t sticking to the sides of the bowl, let it sit for 45 minutes before doing stretch and folds.
3. Stretch & Folds

You do not need to be precise with stretch and folds at all! The goal is to build up gluten strength within the dough. There is no set time or exact amount of times you need to repeat this process. As long as your dough is starting to develop some structure and becomes less sticky, you are doing it right!
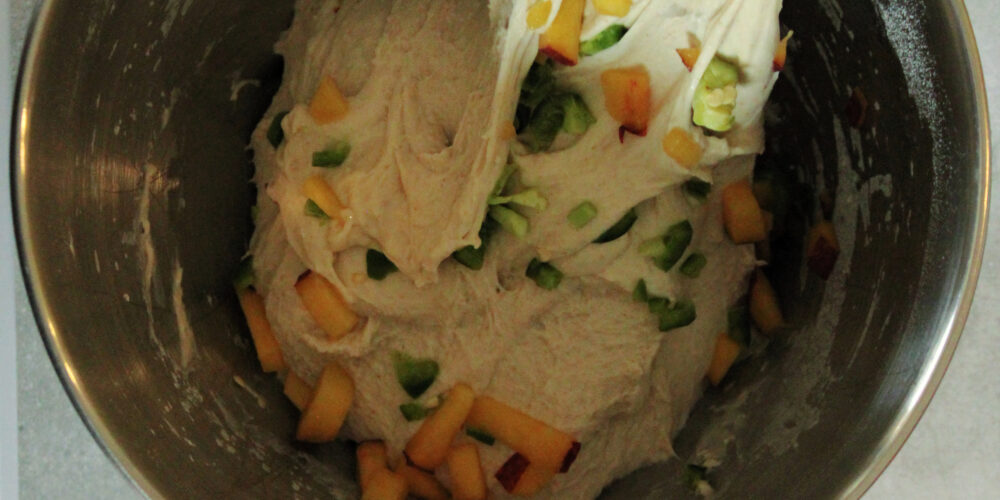
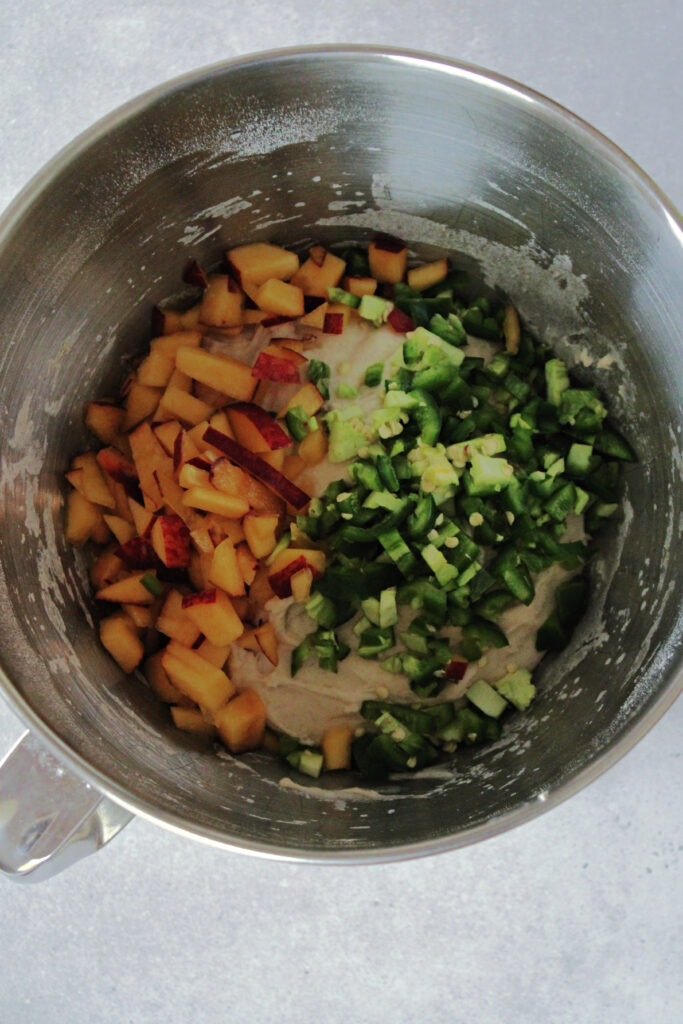
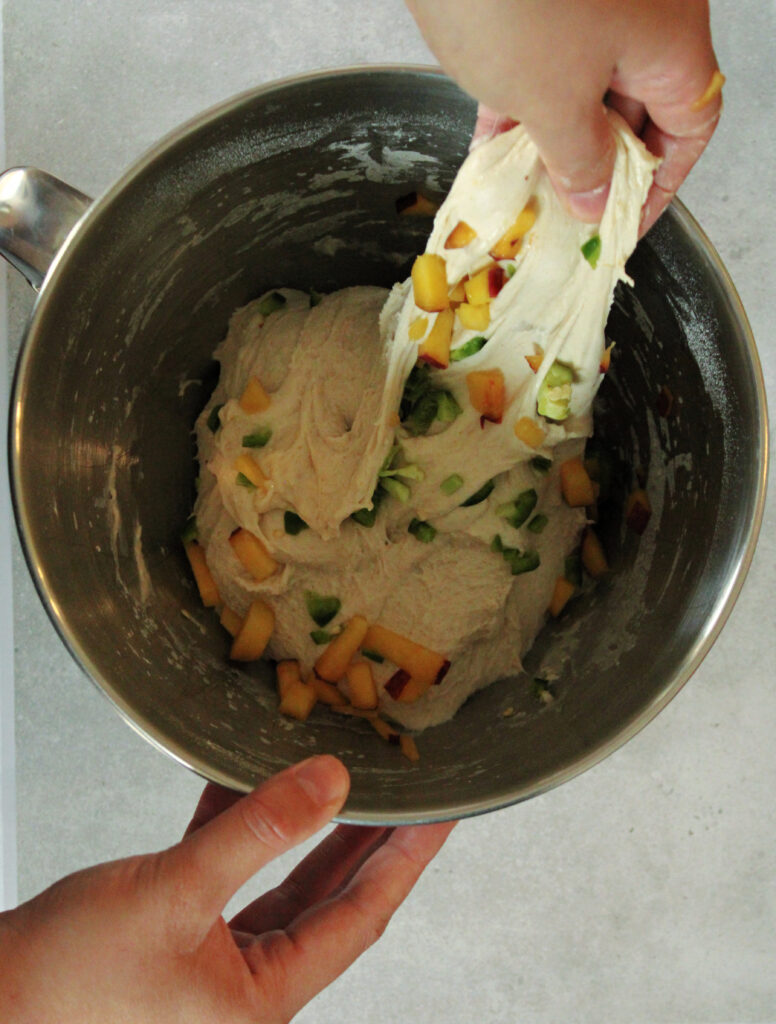
Before you do your first round of stretch and folds, add in the chopped jalapeños and peaches. Adding your inclusions before your stretch and folds will evenly disperse them throughout the dough. Your bread is more likely to bake evenly when the extra hydration from the inclusions is evenly spread out.
Now that your inclusions have been added, the general guide I tend to follow is three rounds of 3 – 4 stretch and folds every 30 minutes. For example:
12:00pm: 3 – 4 stretch and folds (round 1)
12:30pm: 3 – 4 stretch and folds (round 2)
1:00pm: 3 – 4 stretch and folds (last round)
After this, your loaf should not be sticky anymore and should have good structure. The jalapeños and peaches should also be mixed in really well.
4. Bulk Fermentation
Now, we let the dough do its magic. Leave the dough in the mixing bowl on the counter and cover with a tea towel. Allow for a minimum of 8 – 12 hours for bulk fermentation or when the dough doubles in size. The moisture from the peaches and jalapeños might make this stage last a bit longer than usual. Since I make this loaf during the summer, I found that my dough doubled in size pretty quickly and was ready for the final shape just under 8 hours. If you want a fool-proof way to know when your loaf is done fermenting, check out this chart by The Sourdough Journey on Instagram. This chart will show you what temperature your dough should be when it’s done at this stage. So incredibly helpful!
5. Cold Proof
I have an entire blog post on how to make same day sourdough bread by dinnertime and I explain in that post that cold proofing is not completely necessary for sourdough. However, it makes SUCH a difference! If you have the time, I would highly recommend cold proofing your loaf for this recipe. I typically keep my loaves in the fridge for about 12 hours (overnight). The loaf rises a bit more in the fridge and it is a little more sour. The taste is incredible!
6. Final Shape

Preheat your oven to 425 degrees and your dutch oven/loaf pans before the final shape.
Once your loaf is ready to be pulled out of the fridge, pinch the dough together down the middle to make the dough tighter.
Roll out parchment paper and sprinkle flour on the paper before flipping the pinched side down.
7. Score & Bake
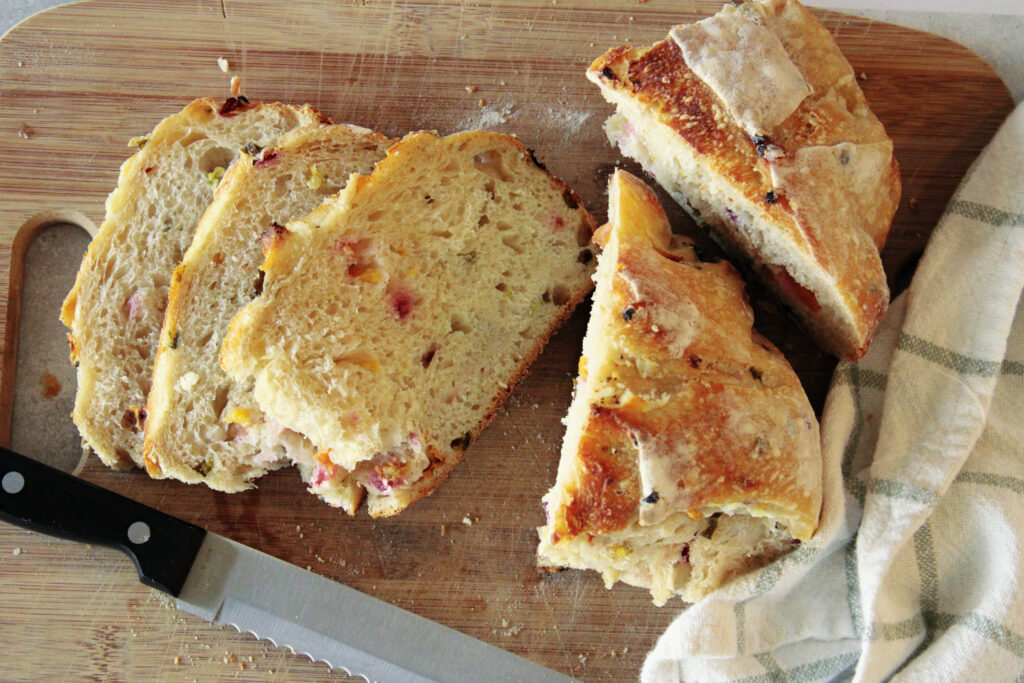
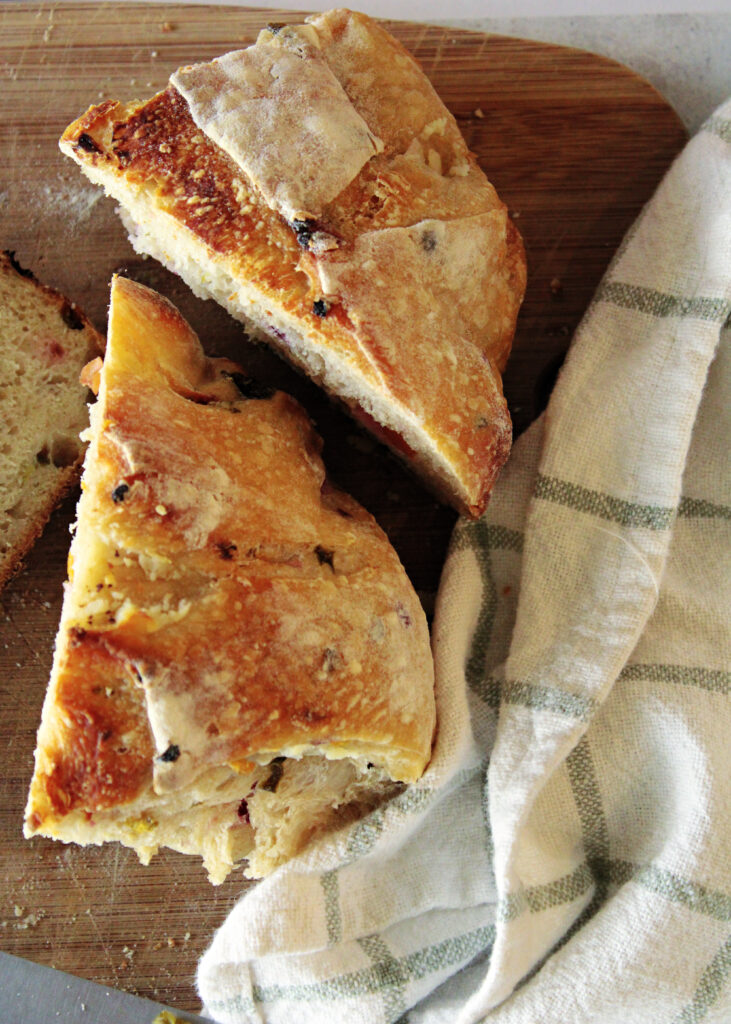
Sprinkle flour on top of your loaf and score your loaf down the middle. I made a few more cuts since this is where we will add in the cream cheese.

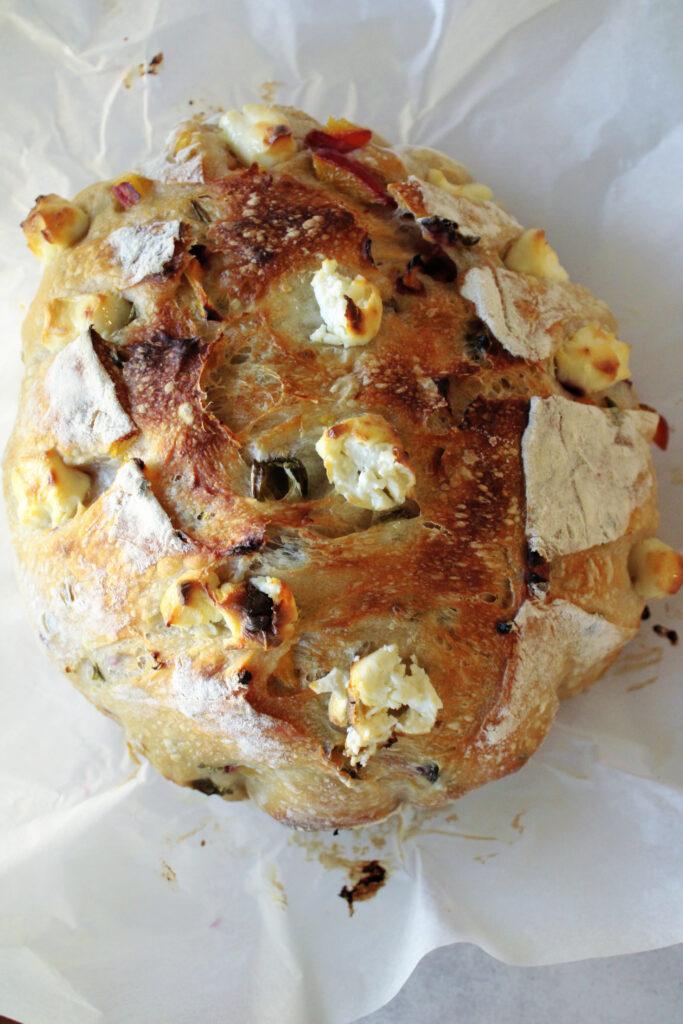
Place your loaf in your preheated dutch oven or loaf pans, and bake at 425 degrees for 25 minutes with the lid on and 25 minutes with the lid off. Enjoy!
Storage
Once your loaf has completely cooled, slice the bread and place in the freezer until you’re ready to toast. This jalapeño popper sourdough with summer peaches can be stored in the freezer for 1 – 3 months and about a week in the fridge.

How to Make Jalapeño Popper Sourdough with Summer Peaches
Equipment
- Measuring cups
- Silicone spatula
- Stand Mixer with dough hook attachment
- Large Bowl
- Dough whisk
- Food scale
- Large knife
- Cutting board
- Banneton basket
- Plastic bag/tea towel
- Sourdough score
- Parchment paper
- Dutch oven/loaf pans
Ingredients
For Feeding Your Starter
- ½ cup Bread flour or all-purpose flour
- ½ cup Whole wheat flour
- 1 – 1½ cups Warm water
For the Dough
- 475 g All-purpose flour
- 112 g Active sourdough starter
- 307 g Warm water
- 10 g Salt
- 1 cup Chopped jalapeños
- 1 cup Chopped peaches
- ½ block Cream cheese
Instructions
1. Feed Your Starter the Night Before
- Ideally, you’ll want to feed your starter 4 – 6 hours before making your loaf. This timeframe is ideal for the summertime, but if your house is on the cooler side or you’re making this during the colder months, your starter might take longer to rise. To make sure your starter is ready to use first thing in the morning, I would recommend feeding it the night before.
2. Mix the Dough
- First, mix your active starter (112g) and warm water (307g) together using a whisk. This will make sure the starter is evenly distributed which is important during bulk fermentation.
- Next, add your flour (475g) and salt (10g) to the mixer. Make sure these ingredients are also well-combined.
- Once all of your ingredients are in the bowl, use the dough hook attachment to combine everything. Keep your mixer on the lowest setting.
- Once your dough comes together and isn't sticking to the sides of the bowl, let it sit for 45 minutes before doing stretch and folds.
3. Stretch & Folds
- You do not need to be precise with stretch and folds at all! The goal is to build up gluten strength within the dough. There is no set time or exact amount of times you need to repeat this process. As long as your dough is starting to develop some structure and becomes less sticky, you are doing it right!
- Before you do your first round of stretch and folds, add in the chopped jalapeños and peaches. Adding your inclusions before your stretch and folds will evenly disperse them throughout the dough. Your bread is more likely to bake evenly when the extra hydration from the inclusions is evenly spread out.
- Now that your inclusions have been added, the general guide I tend to follow is three rounds of 3 – 4 stretch and folds every 30 minutes. For example:12:00pm: 3 – 4 stretch and folds (round 1)12:30pm: 3 – 4 stretch and folds (round 2)1:00pm: 3 – 4 stretch and folds (last round)
- After this, your loaf should not be sticky anymore and should have good structure. The jalapeños and peaches should also be mixed in really well.
4. Bulk Fermentation
- Leave the dough in the mixing bowl on the counter and cover with a tea towel. Allow for a minimum of 8 – 12 hours for bulk fermentation or when the dough doubles in size. The moisture from the peaches and jalapeños might make this stage last a bit longer than usual.If you want a fool-proof way to know when your loaf is done fermenting, check out the bulk fermentation chart by The Sourdough Journey on Instagram. This chart will show you what temperature your dough should be when it's done at this stage. So incredibly helpful!
5. Cold Proofing
- If you have the time, I would highly recommend cold proofing your loaf for this recipe. I typically keep my loaves in the fridge for about 12 hours (overnight). The loaf rises a bit more in the fridge and it is a little more sour. The taste is incredible!
6. Final Shape
- Preheat your oven to 425 degrees and your dutch oven/loaf pans before the final shape.
- Once your loaf is ready to be pulled out of the fridge, pinch the dough together down the middle to make the dough tighter.
- Roll out parchment paper and sprinkle flour on the paper before flipping the pinched side down.
7. Score & Bake
- Sprinkle flour on top of your loaf and score your loaf down the middle. I made a few more cuts since this is where we will add in the cream cheese.
- Place your loaf in your preheated dutch oven or loaf pans, and bake at 425 degrees for 25 minutes with the lid on and 25 minutes with the lid off. Enjoy!
Notes
Storage
Once your loaf has completely cooled, slice the bread and place in the freezer until you’re ready to toast. This jalapeño popper sourdough with summer peaches can be stored in the freezer for 1 – 3 months and about a week in the fridge.If you try out this Jalapeño Popper Sourdough with Summer Peaches, please rate it and leave a comment below. This helps other readers decide if this is a great recipe to bake. Also, don’t forget to tag me on Instagram @goldenhourgrains so I can see what you’re baking!
Want More Recipes?
Here are some of my favorite bread recipes!
How to Make Same Day Sourdough by Dinnertime
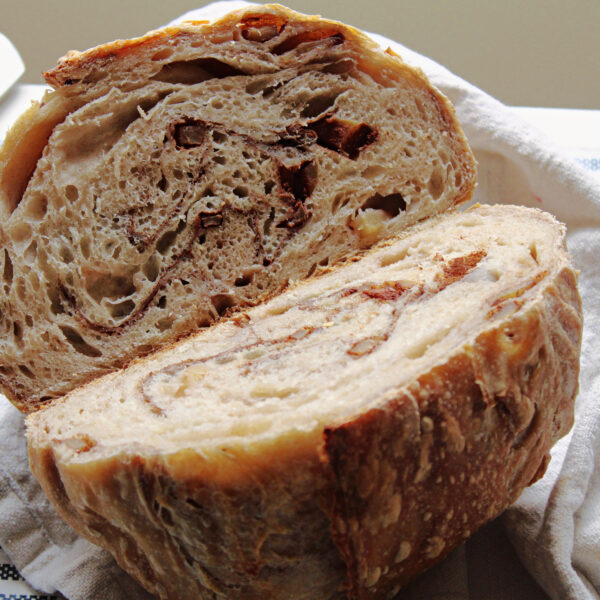
Chocolate Swirl Sourdough Bread
Pumpkin Cinnamon Sourdough Bread
Pin for Later
How to Make Jalapeño Popper Sourdough with Summer Peaches
Equipment
- Measuring cups
- Silicone spatula
- Stand Mixer with dough hook attachment
- Large Bowl
- Dough whisk
- Food scale
- Large knife
- Cutting board
- Banneton basket
- Plastic bag/tea towel
- Sourdough score
- Parchment paper
- Dutch oven/loaf pans
Ingredients
For Feeding Your Starter
- ½ cup Bread flour or all-purpose flour
- ½ cup Whole wheat flour
- 1 – 1½ cups Warm water
For the Dough
- 475 g All-purpose flour
- 112 g Active sourdough starter
- 307 g Warm water
- 10 g Salt
- 1 cup Chopped jalapeños
- 1 cup Chopped peaches
- ½ block Cream cheese
Instructions
1. Feed Your Starter the Night Before
- Ideally, you’ll want to feed your starter 4 – 6 hours before making your loaf. This timeframe is ideal for the summertime, but if your house is on the cooler side or you’re making this during the colder months, your starter might take longer to rise. To make sure your starter is ready to use first thing in the morning, I would recommend feeding it the night before.
2. Mix the Dough
- First, mix your active starter (112g) and warm water (307g) together using a whisk. This will make sure the starter is evenly distributed which is important during bulk fermentation.
- Next, add your flour (475g) and salt (10g) to the mixer. Make sure these ingredients are also well-combined.
- Once all of your ingredients are in the bowl, use the dough hook attachment to combine everything. Keep your mixer on the lowest setting.
- Once your dough comes together and isn't sticking to the sides of the bowl, let it sit for 45 minutes before doing stretch and folds.
3. Stretch & Folds
- You do not need to be precise with stretch and folds at all! The goal is to build up gluten strength within the dough. There is no set time or exact amount of times you need to repeat this process. As long as your dough is starting to develop some structure and becomes less sticky, you are doing it right!
- Before you do your first round of stretch and folds, add in the chopped jalapeños and peaches. Adding your inclusions before your stretch and folds will evenly disperse them throughout the dough. Your bread is more likely to bake evenly when the extra hydration from the inclusions is evenly spread out.
- Now that your inclusions have been added, the general guide I tend to follow is three rounds of 3 – 4 stretch and folds every 30 minutes. For example:12:00pm: 3 – 4 stretch and folds (round 1)12:30pm: 3 – 4 stretch and folds (round 2)1:00pm: 3 – 4 stretch and folds (last round)
- After this, your loaf should not be sticky anymore and should have good structure. The jalapeños and peaches should also be mixed in really well.
4. Bulk Fermentation
- Leave the dough in the mixing bowl on the counter and cover with a tea towel. Allow for a minimum of 8 – 12 hours for bulk fermentation or when the dough doubles in size. The moisture from the peaches and jalapeños might make this stage last a bit longer than usual.If you want a fool-proof way to know when your loaf is done fermenting, check out the bulk fermentation chart by The Sourdough Journey on Instagram. This chart will show you what temperature your dough should be when it's done at this stage. So incredibly helpful!
5. Cold Proofing
- If you have the time, I would highly recommend cold proofing your loaf for this recipe. I typically keep my loaves in the fridge for about 12 hours (overnight). The loaf rises a bit more in the fridge and it is a little more sour. The taste is incredible!
6. Final Shape
- Preheat your oven to 425 degrees and your dutch oven/loaf pans before the final shape.
- Once your loaf is ready to be pulled out of the fridge, pinch the dough together down the middle to make the dough tighter.
- Roll out parchment paper and sprinkle flour on the paper before flipping the pinched side down.
7. Score & Bake
- Sprinkle flour on top of your loaf and score your loaf down the middle. I made a few more cuts since this is where we will add in the cream cheese.
- Place your loaf in your preheated dutch oven or loaf pans, and bake at 425 degrees for 25 minutes with the lid on and 25 minutes with the lid off. Enjoy!


Leave a Reply